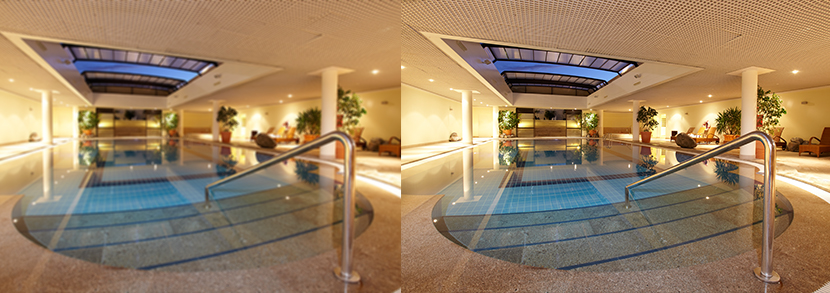
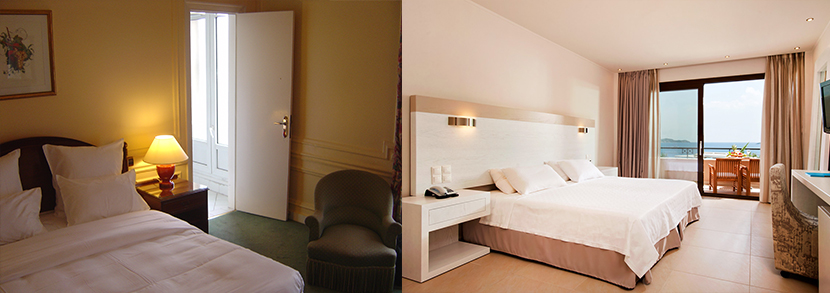
Every month the trivago content team rejects hundreds of images submitted by hotel managers. Why? It’s two fold. First off, the photos fail to meet our quality standards. Secondly, it may sound cruel, but no image can be less damaging than a bad image.
So instead of risking it, consult our simple tips for better hotel photos and learn how to upload photos to your trivago profile that will not only be approved, they’ll sell your property. We’re using the acronym CLEAR, so that it’s easy to remember. Feel free to write it on a post-it note and tack it up by your computer; making it harder to forget.
Not only will CLEAR imagery help you avoid rejection when submitting pictures for your online profiles, it will help you catch the attention of potential guests. The more time that travelers spend ogling your hotel photos the better. Why? Because they’ll be more likely to book if they like what they see!
These tips for attractive images extend to your website and social media profiles as well. After reading this, take a look at how your property appears online. Do you like what you see? If not, replace the bad photos or delete them until better ones are available to you.
Ok, let’s get started.
Access simple solutions to succeed on trivago.
Clear
Often overlooked, the first step is to ensure the room you’re photographing is clear and tidy. Let nothing distract from the main purpose and design of the room.
If you don’t want to replace your imagery too often, avoid including technology such as computers, phones, or cars. At the rate tech is advancing, these items will quickly date your photos, making the accuracy of the image questionable.
Light
Seasoned photographer Mike Browne explains that “photographing interiors is all about capturing the way the room looks (and feels) as naturally as possible”. Lighting is arguably the most important factor in photography. Correct lighting can completely change a space. Consider what the traveler is looking for; tranquillity, warmth, and open space. Watch out for shadows that natural light and room lamps can cause. Instead, look for ways to discreetly place additional lighting to illuminate these dark spaces. We suggest that you watch photographer Noah Fallis show how light can transform a hotel interior to learn more about this concept.
Natural light also helps the room looks its best. Avoid artificial lights that cast blue or orange hues on the room. Instead, plan to have photos taken when the optimal amount of natural light is available for that space. When shooting the hotel exterior or outdoor amenities, optimal lighting is naturally available during what’s known to photographers as the ‘golden hour’. This occurs twice daily; shortly after sunrise and just prior to sunset.
Edit
Postproduction is as important as the preparation and the photo itself. By using the correct editing tools, you can enhance even some of your seemingly irredeemable pictures. Luckily, you don’t have to spend an arm and a leg on professional editing software. There are some free options on the market such as Pixlr Editor and Express. These options offer a toolbox of basic editing features and tricks that allow you to sharpen blurred images, make color corrections, and play with lighting. Typically, you don’t want to become overly ‘artistic’ with filters or effects, either. Keep in mind that the final image should still appear natural and accurate.
Angle
Focus and engage. When shooting an interior, there can be many restrictions that can make the size of the room appear instantly smaller. Walls are the worst culprit. To avoid unflattering distortion, try shooting through a door with a wide angled lens to gain space. Compose each of your photos with the facilities in mind and remember that you are controlling what the viewer sees. Ask yourself: Are you trying to show off the bedroom’s balcony access? Or additional living space? Once you have a few images, play with cropping to further manipulate the focus of the photo. The above-mentioned tools will help you to crop as well as straighten photos that aren’t level.
Resolution
The last and simplest point is resolution. This refers to the image size, and it’s represented by the number of pixels the photo contains. You may have seen the resolution of an image expressed before as width X height. High-resolution photos are the preferred type of imagery to be used on many metasearch sites. This is because the higher the pixel count, the sharper the image will appear when re-sized online. Armed with a decent camera (potentially a very high-quality smart phone) and a tripod, you can take sharp images that will look professional. Ensure a 2,000-pixel minimum when uploading these images to websites.

Go through your pictures and check that you’ve taken a variety that showcase the facilities of the hotel with a width of at least 2,000 pixels. Once you’ve selected the best ones that you want to publish, upload the files to your online hotel profile(s). Remember: you don’t need to invest in expensive professional equipment to have great looking hotel photos. All you have to do is pick up some professional habits and a trained eye.


